Physiotherapist | 6 min read
Bridge Pose: How to do, Tips, Benefits and Modifications
Medically reviewed by
Table of Content
Synopsis
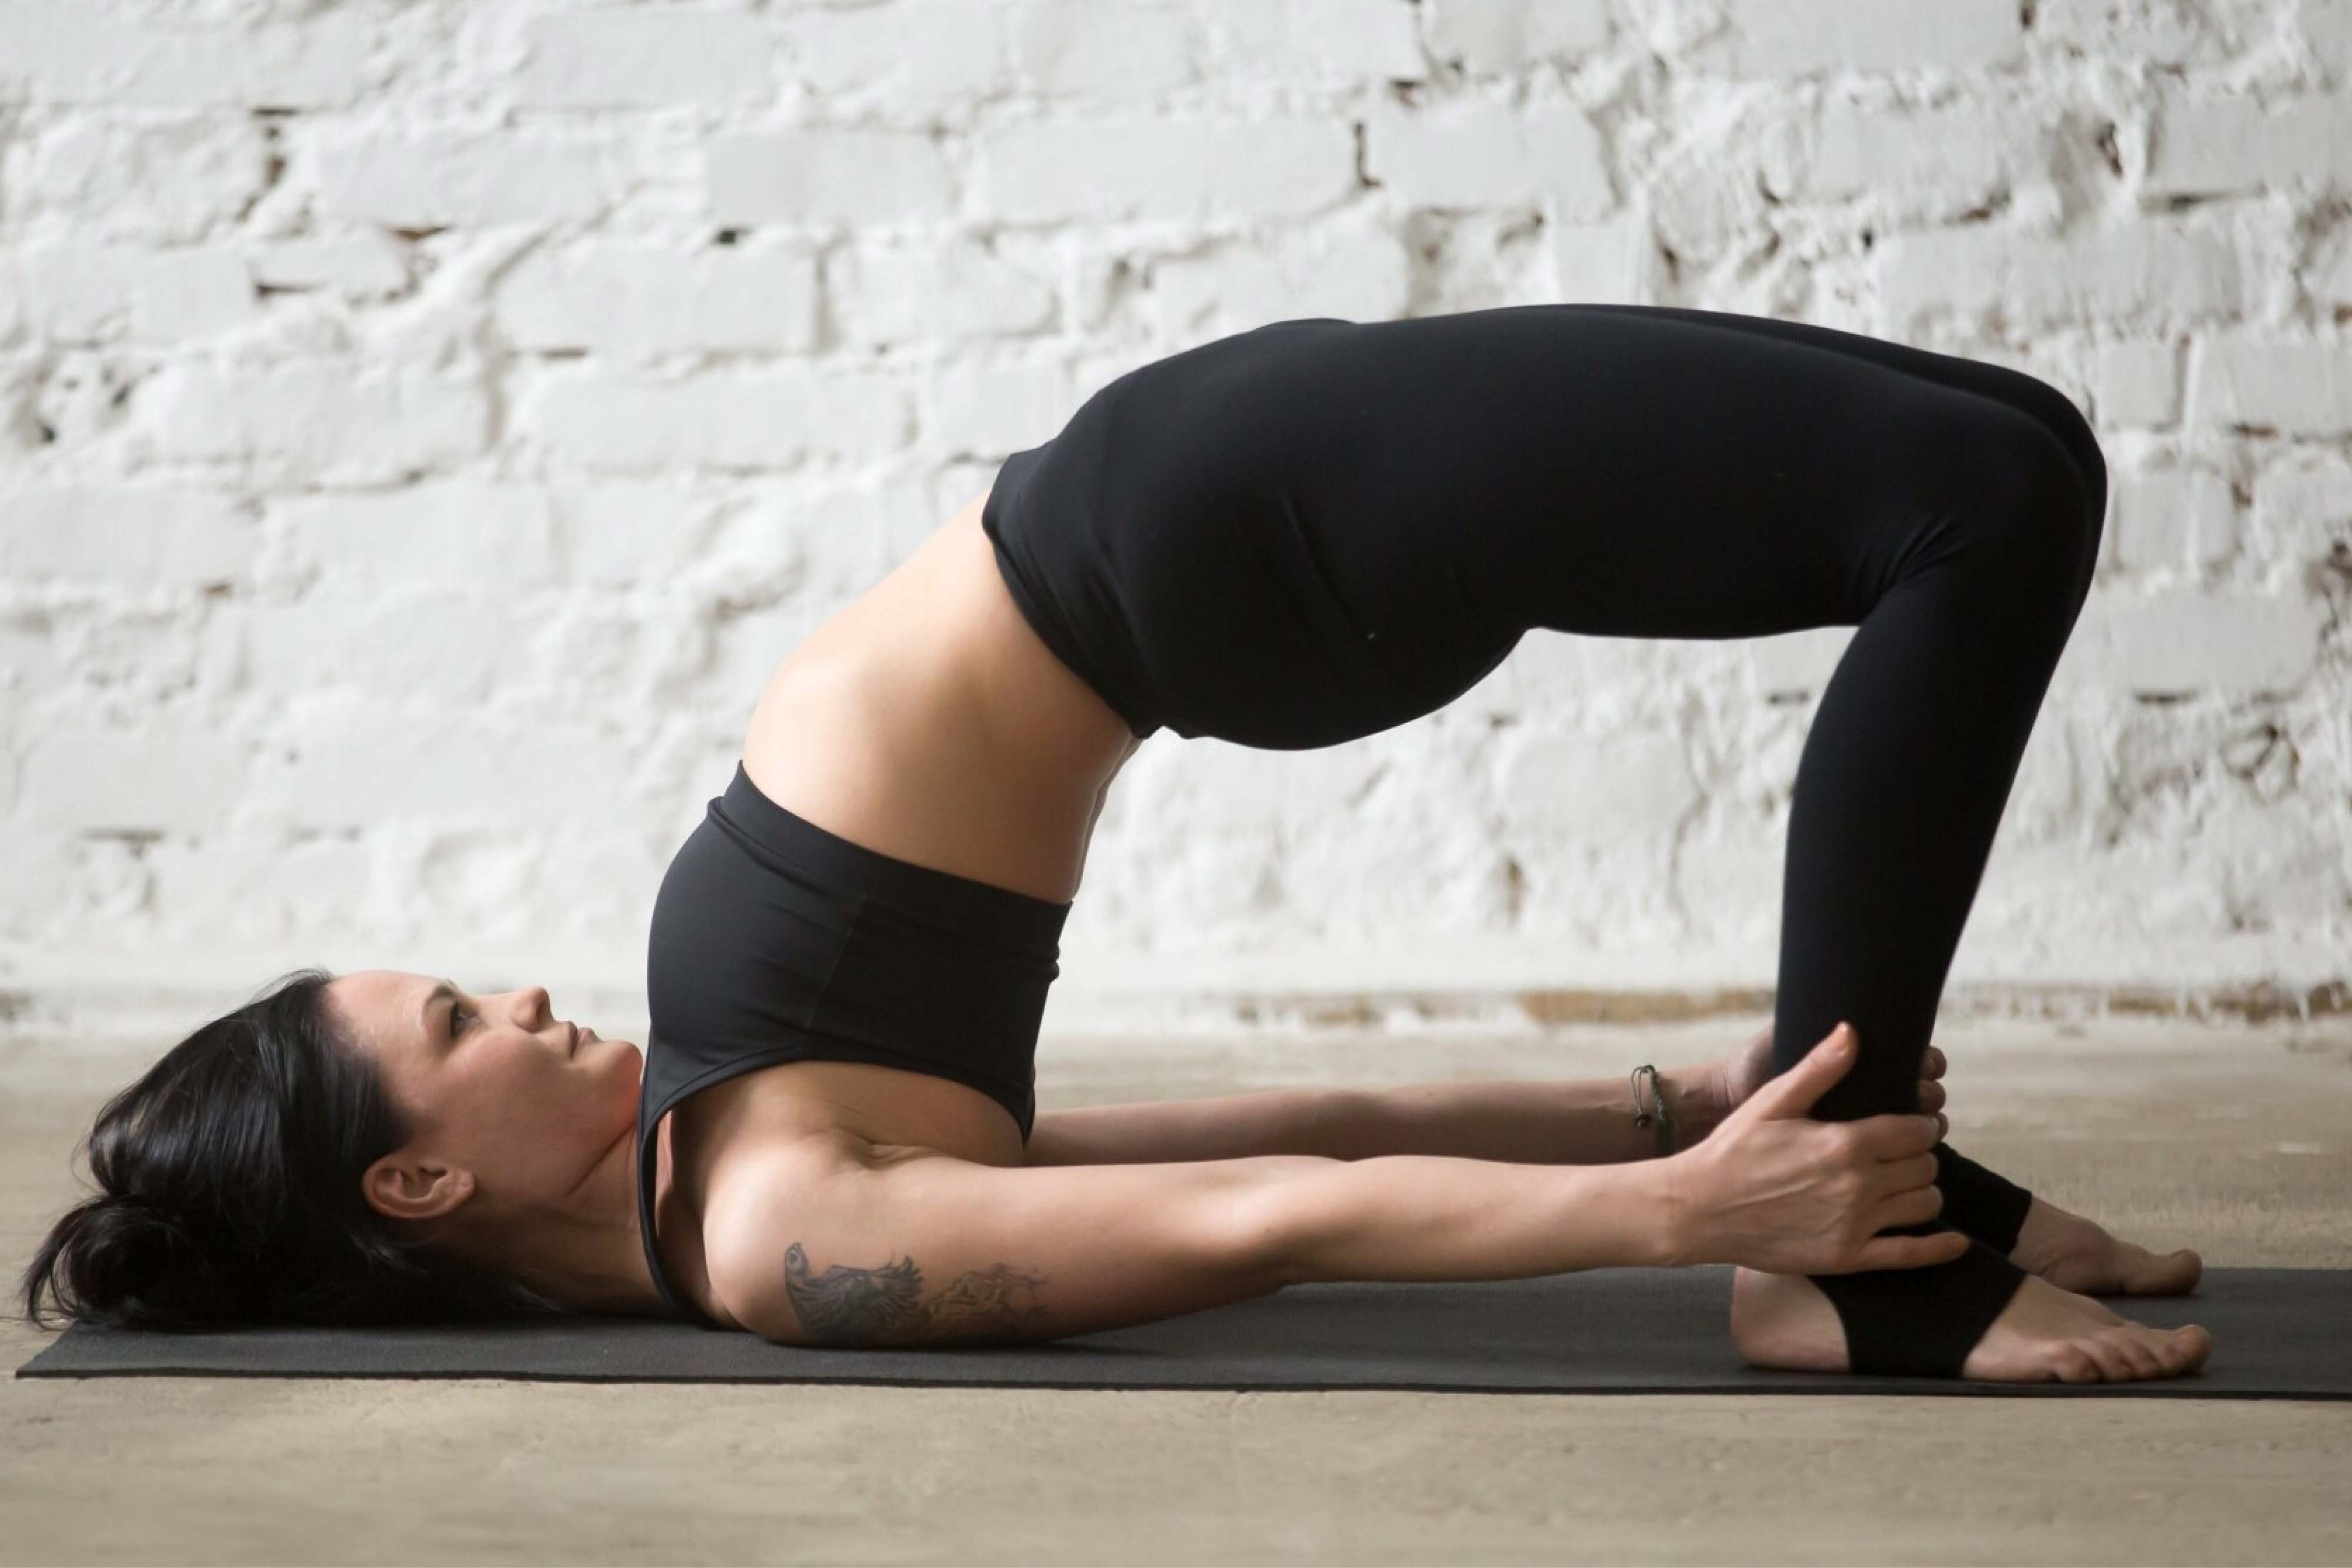
Yoga's bridge posture, also known as Setu Bandha Sarvangasana, is a supine backbend that opens the chest and helps your respiratory system. This asana (position) aims to lift the hips and sternum while pressing the arms into the mat to create a bridge-like effect with the body for the superb stretch possible.
Key Takeaways
- Yoga's bridge posture, also known as Setu Bandha Sarvangasana, is a reclining backbend that also opens the chest
- It can prevent slouching and possibly ease low back pain
- Stimulates the body's seven chakras
Setu means bridge, bandha means to lock or bind, Sarva means all, anga means limbs, and asana means posture in the Sanskrit language, which is where the phrase Setu bandha Sarvangasana originates. The English name for this pose is a shoulder-supported bridge pose.
Setu Bandhasana (Bridge Pose) Steps To D0:
- Start the pose by laying flat on your back, arms by your sides, and legs extended. Bring your heels as near as you can to your sitting bones.
- Lift your bottom and place your inner arms and feet on the ground as you exhale. Ensure that your thighs and inner foot are parallel in this bridge pose yoga. Put your arms behind your pelvis and extend them outward to rest on your shoulder blades.
- Lift your bottom higher so your knees are over your heels and your thighs are still perpendicular to the floor. Make sure to stretch the tailbone toward the knees and press the knees forward away from the hips.
- As you raise your chin and turn it away from your chest, push your shoulder blades firmly into your back. You should also move your sternum in the direction of your chin. By strengthening your outside arms, you should enlarge your shoulder blades and push your neck's base into your body.
- Breathe as you raise your hips and chest, feel your neck, spine, and hips stretch, watch the blood flow, and take a deep breath.
- For as long as a minute, hold. Unclasp your hands and rest them palms down next to your torso to release. Exhale as you move your spine vertebrae by vertebrae over the floor.
- Allow both of your knees to sag during bridge pose yoga. To support your weight, place a yoga block under your hips.

Tips for Performing Bridge Pose
Observe these pointers as you practice the bridge pose:
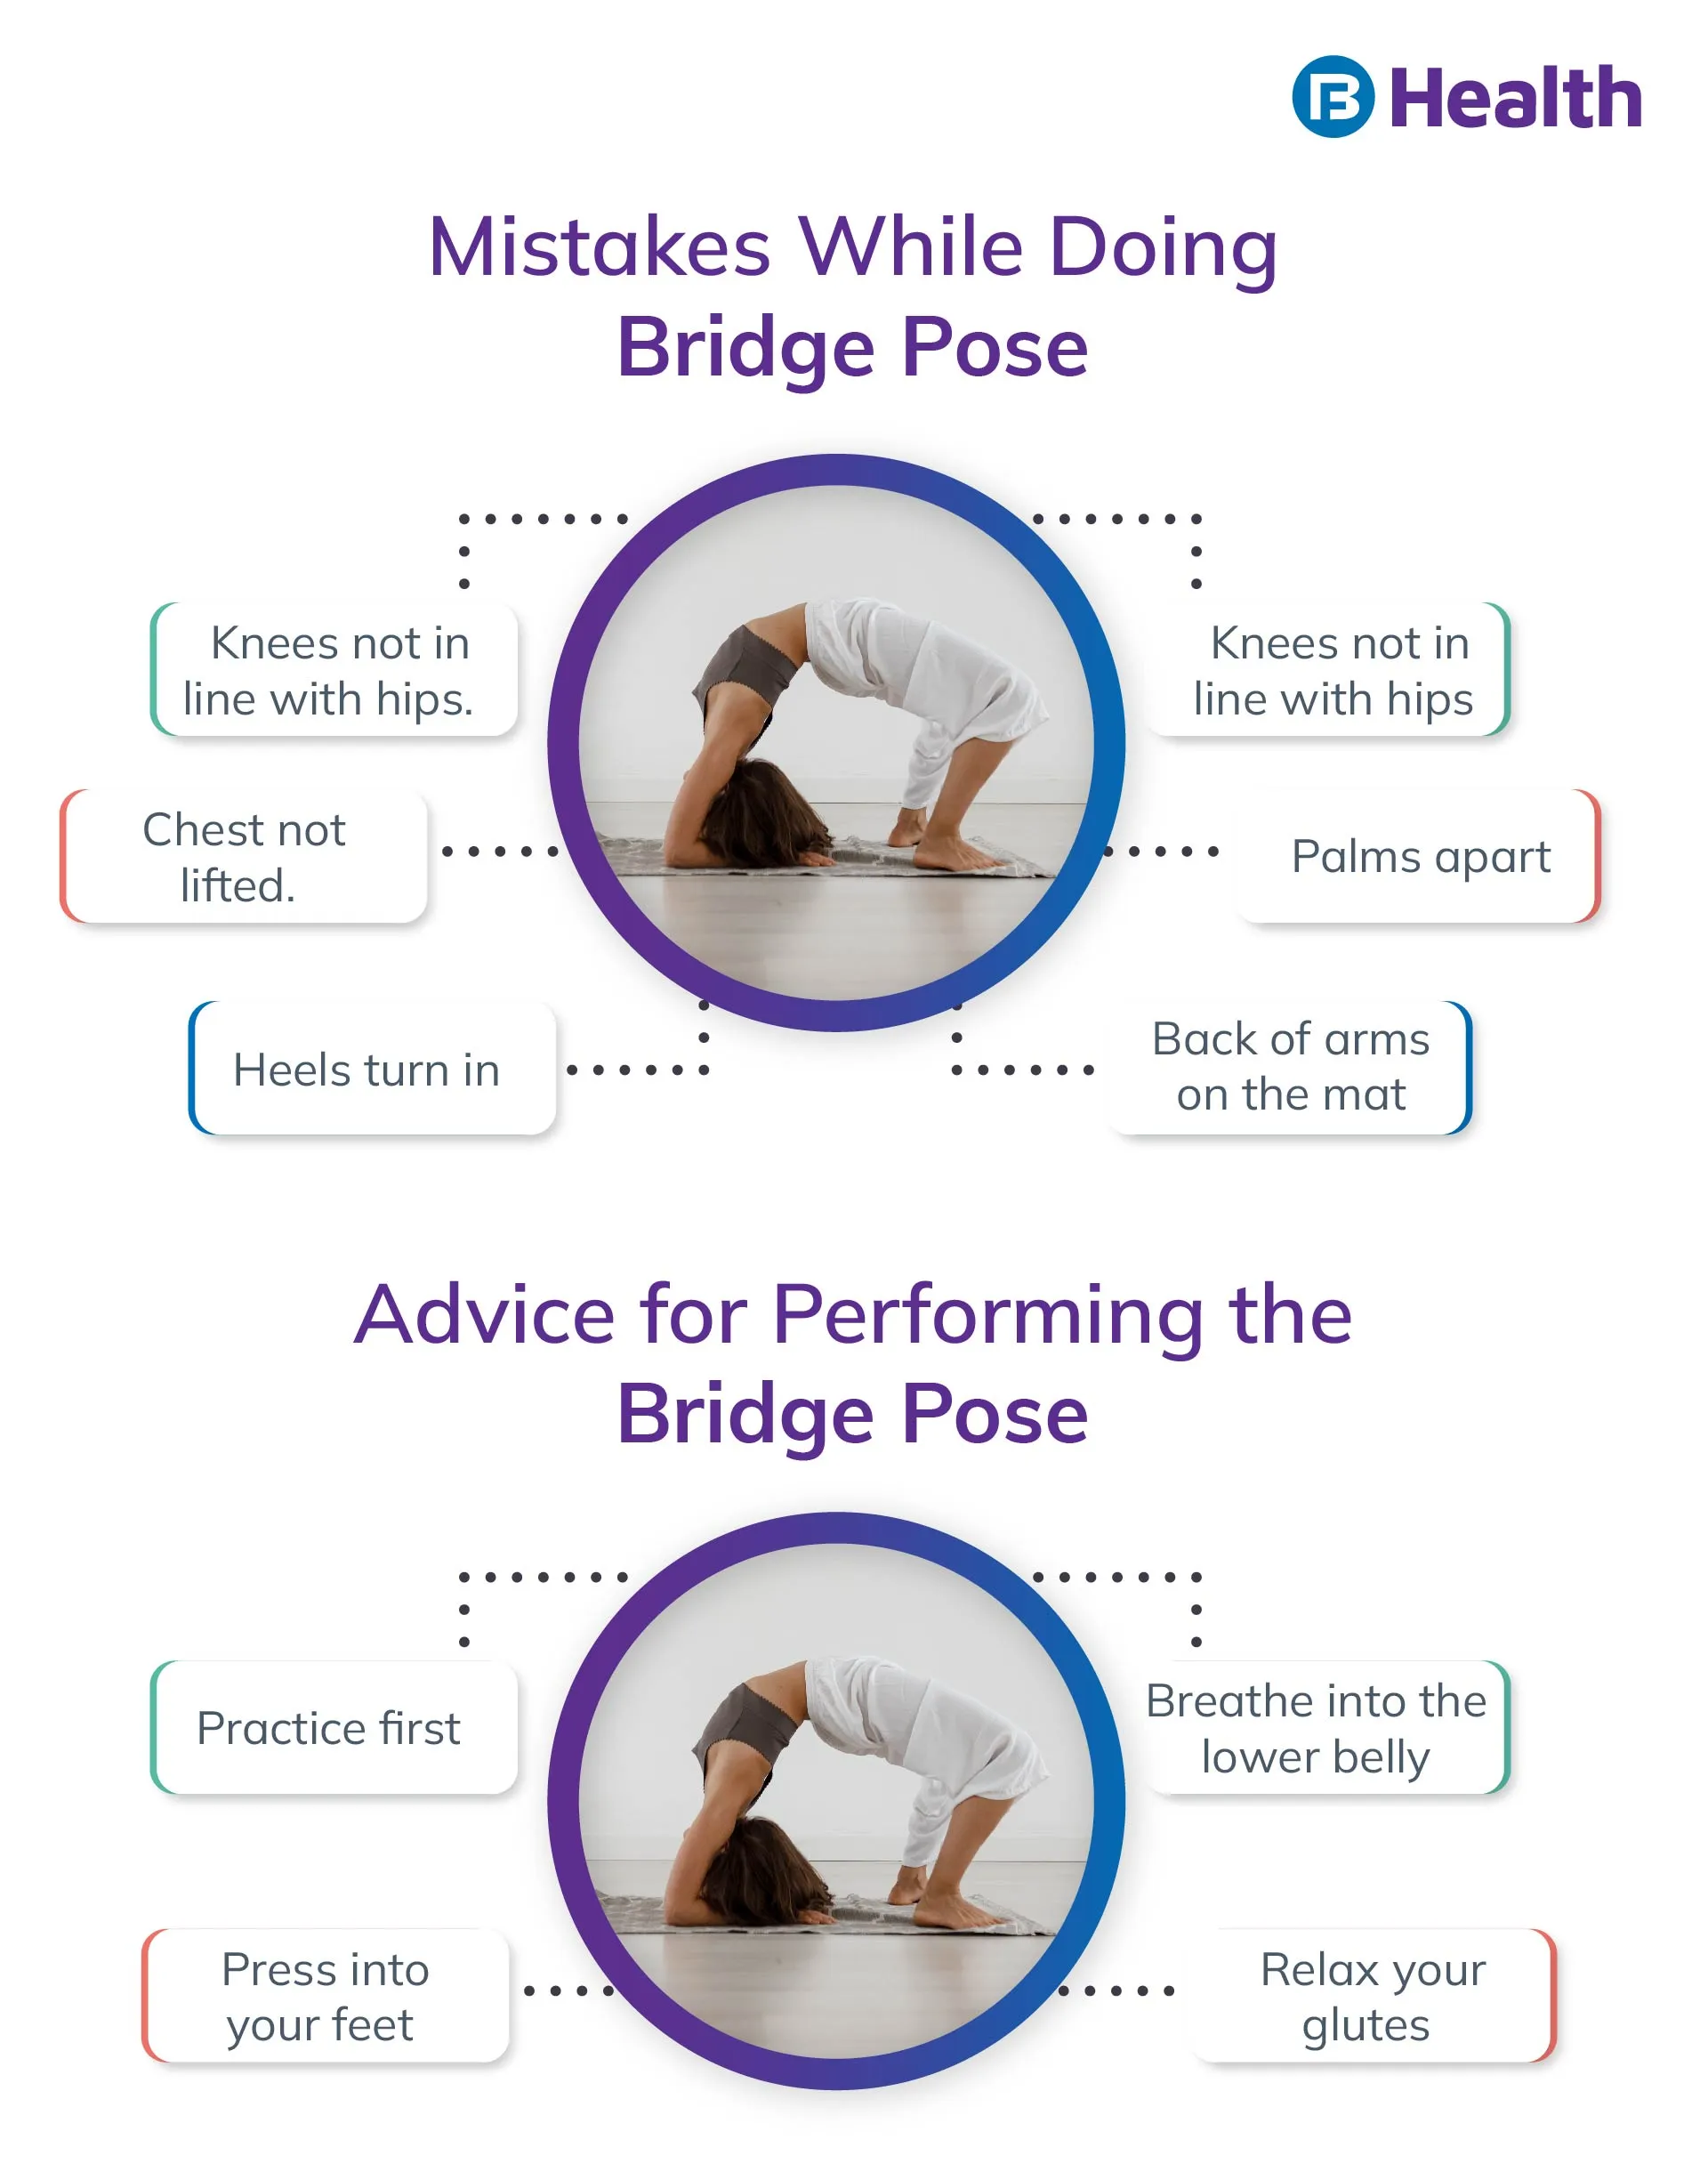
- Practice first: The yoga instructor will often guide you through two to three rounds of bridge posture in a yoga class. You could try practicing this repeat if you are doing a bridge position at home since you can lift your hips higher and bend your back further with each round.
- Press into your feet: You may lift your hips higher if you press more firmly into the soles of your feet.
- Breathe into the lower belly: This is important in the bridge pose because it can help you relax and hold the position for a more extended period to benefit from its deep stretch. Breathe out slowly and consciously, and leave the bridge pose.
- Relax your glutes: Use your leg muscles to elevate your hips, and then relax your glutes to make them feel like apples hanging from a tree.
Bridge Pose Benefits (Setu Bandhasana):
Setu Bandha Sarvangasana's benefits are as follows:
- Reduces pain: One of the Setu Bandha Sarvangasana benefits is that this also reduces weariness brought on by tight muscles, as well as headaches, backaches, and neck aches.
- Burns fat: According to Kundalini Yoga instructors, Setu Bandha Sarvangasana is another exercise people use to reduce belly fat and tone their thighs and hips.
- Reduces stress: It can also help to quiet your thoughts and reduce the signs of stress and despair.
- Enhances body function: Setu Bandha Sarvangasana can stimulate your thyroid, lungs, and abdominal organs, stretching and strengthening your body.
- Better digestion: It can also improve digestion, reducing acidity and constipation risk.
- Health is improved: Bridge poses yoga provides therapeutic benefits for diseases like menopause, asthma, and high blood pressure.
- Stimulates Chakras: The Muladhara (root), Visuddha (throat), and Anahata (heart) chakras can all be stimulated by the Setu Bandha Sarvangasana yoga pose.
Guidelines for Bridge Pose Practice (Setu Bandhasana):
- By holding the bridge pose, yoga practitioners can enjoy the advantages of an inversion without actually being upside-down.
- According to general physicians, one should avoid this if you have a neck injury unless you are under the care of a professional since you risk doing yourself more harm.
- It's also vital to avoid pulling the shoulders away from the ears if you're new to this stance because doing so can overstretch the neck.
- Do not overly pull your shoulders away from your ears when you are in the total variation of the stance. You run the risk of injuring your neck by doing this.
- Do not turn your head to the right or left when you are in the stance. This could harm your neck.
- Never force your body to assume the stance deeper. On some days, you'll elevate your hips high; on others, a block might be more appropriate for support in Setu Bandha Sarvangasana.
- Always do Savasana after bridge poses to relax your body.
Variations & Modifications
The bridge pose is a fantastic method to relieve the strain of prolonged sitting. As a therapeutic position for intense relaxation, it can also be utilized as a warm-up for deeper backbends. You can also book an online appointment with a yoga instructor. Try these easy adjustments to deepen or lighten the stance to find a variant that is most comfortable for you:
- Place a block beneath your sacrum, the region of your lower back that is right above your tailbone, to support your pelvis if you're having problems maintaining your hips elevated or to produce a therapeutic variation of the pose. Allow the block to keep your weight in Setu Bandha Sarvangasana.
- Instead of clasping your hands beneath your torso, if your shoulders are extremely stiff, keep your hands alongside the body with palms pressing into the mat.
- Try the one-legged bridge pose (Eka Pada Setu Bandha Sarvangasana) for a more challenging pose. Step into the pose's whole configuration. Draw your right knee toward your chest after that while exhaling. You can also try Vrikshasana to improve your balance.
- As you straighten your leg and raise your heel toward the ceiling, inhale. Lift higher through your heel as if your foot were flat against the ceiling. Hold for up to 30 seconds, then exhale as you lower your foot. On the other side, repeat.
- Students with more experience could try holding the stance with relaxed buttocks. Lifting the hips requires the thigh muscles. Close your eyes to focus on breathing for a more introspective experience while performing the pose.
While practicing yoga has many positive effects on the body and mind, it is not a replacement for medical care. It's crucial to study and practice yoga poses under the guidance of a certified yoga instructor. After contacting a doctor and a yoga instructor, perform yoga poses if you have any medical conditions.
References
Disclaimer
Please note that this article is solely meant for informational purposes and Bajaj Finserv Health Limited (“BFHL”) does not shoulder any responsibility of the views/advice/information expressed/given by the writer/reviewer/originator. This article should not be considered as a substitute for any medical advice, diagnosis or treatment. Always consult with your trusted physician/qualified healthcare professional to evaluate your medical condition. The above article has been reviewed by a qualified doctor and BFHL is not responsible for any damages for any information or services provided by any third party.
